AdPeeps Knowledge Center
Guides, explanations, and troubleshooting tips to help you get the most out of AdPeeps
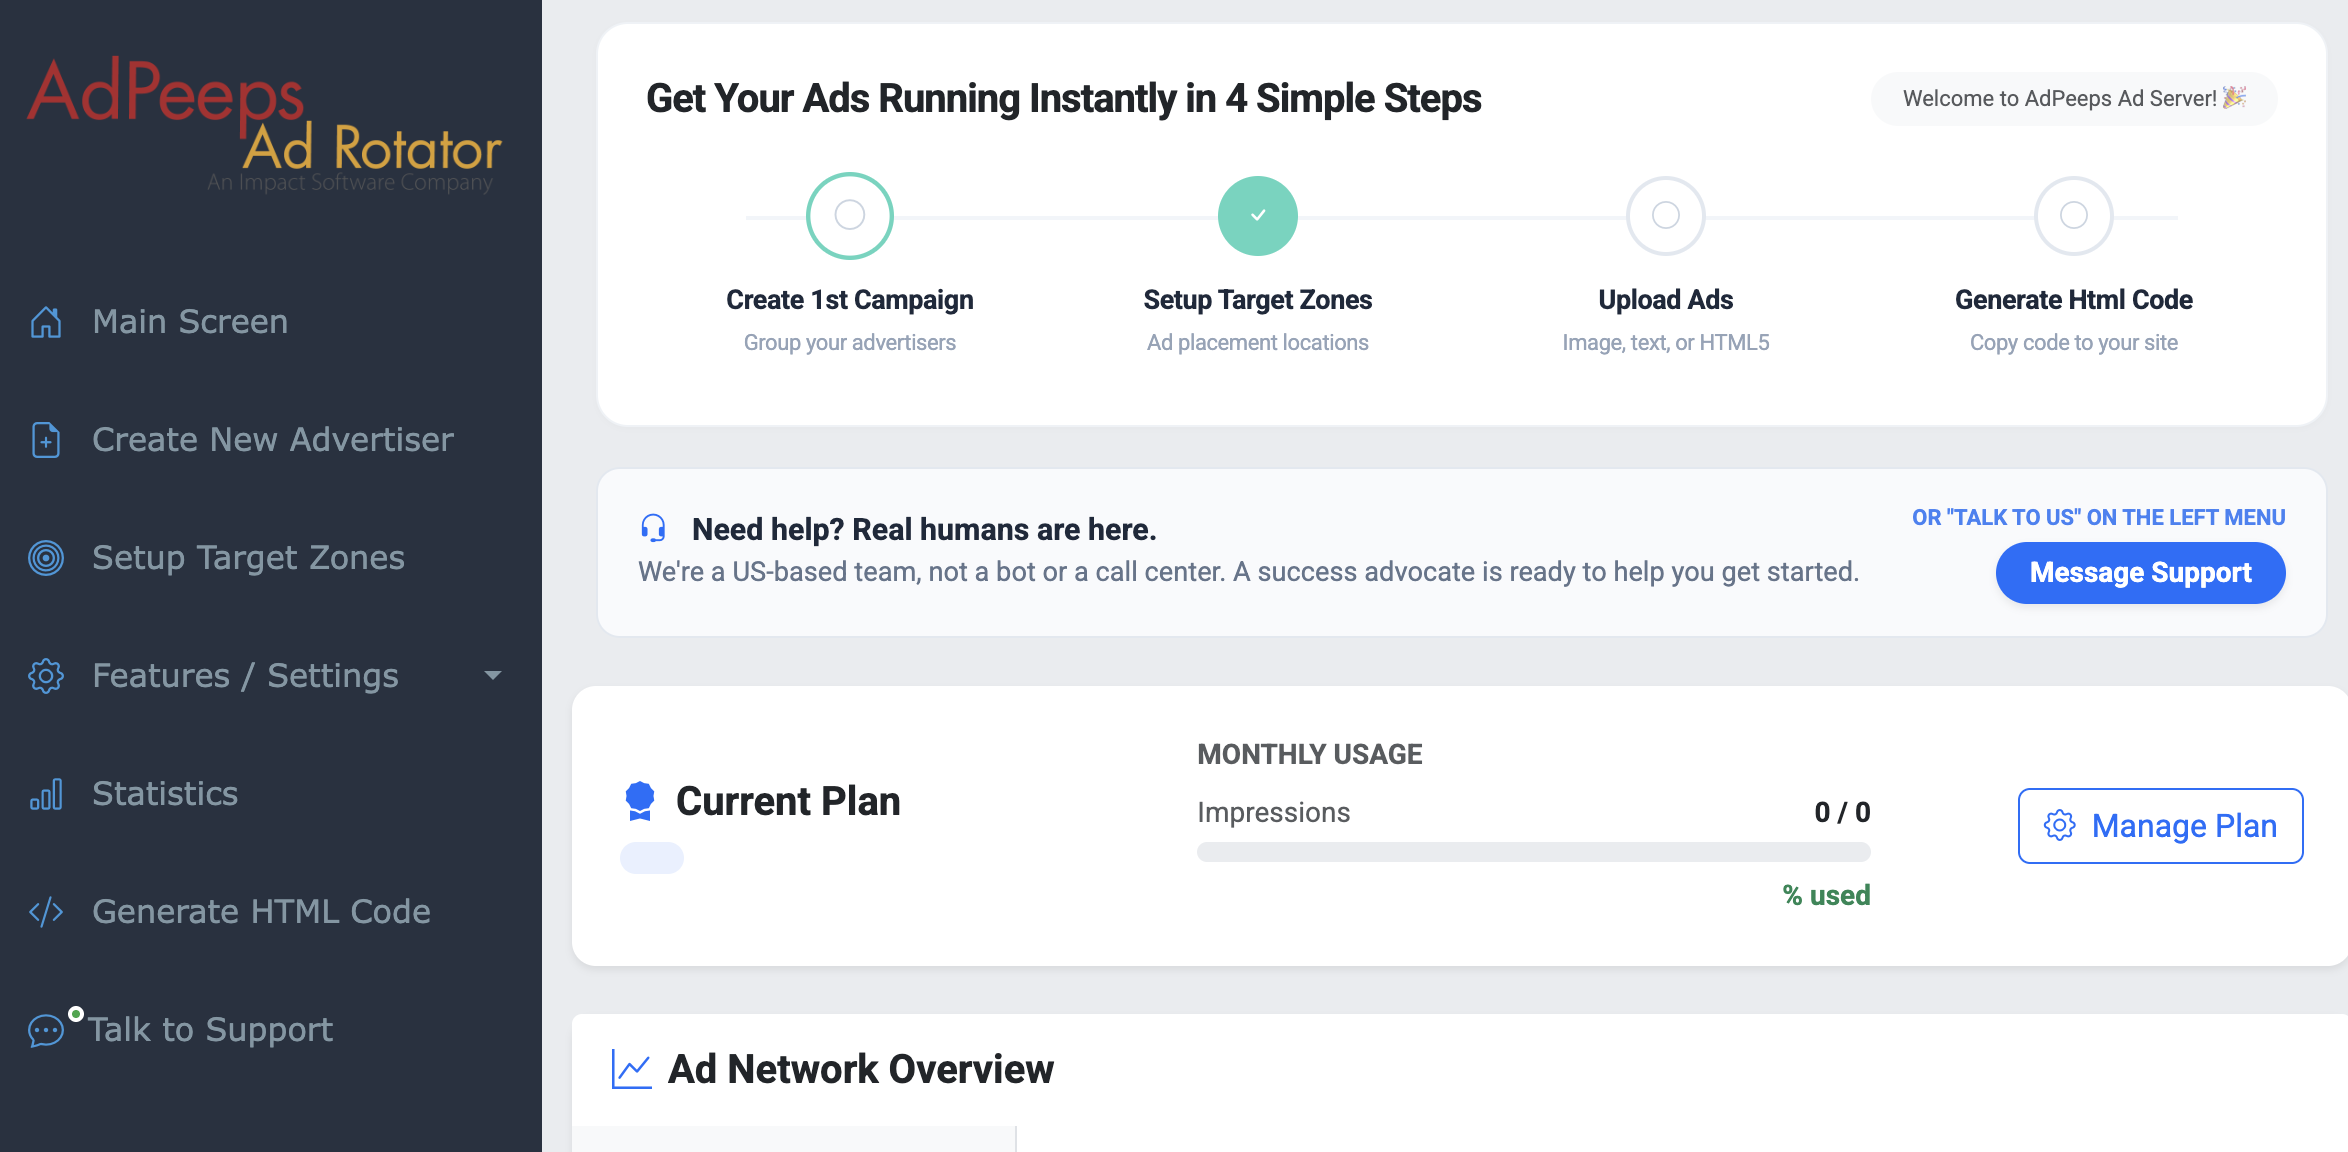
Getting Started in 10 Minutes
Getting Around
The platform is designed with simplicity in mind — everything you need is conveniently accessible from the left-side navigation menu. Whether you’re setting up your first campaign or generating ad code, all of your tools are just a click away.
Your Four Main Tasks
Getting your banner ads up and running is easier than you might think! The platform is built around four core tasks that take most publishers less than 10 minutes to complete from start to finish:
- Create a Campaign – Set up and organize your ad campaign
- Set a Target Zone – Define where your ads will appear on your site
- Upload Your Ad – Add your banner and configure key settings like expiration dates, geotargeting, and destination URLs
- Generate HTML Code – Grab your embed code and place it on your website
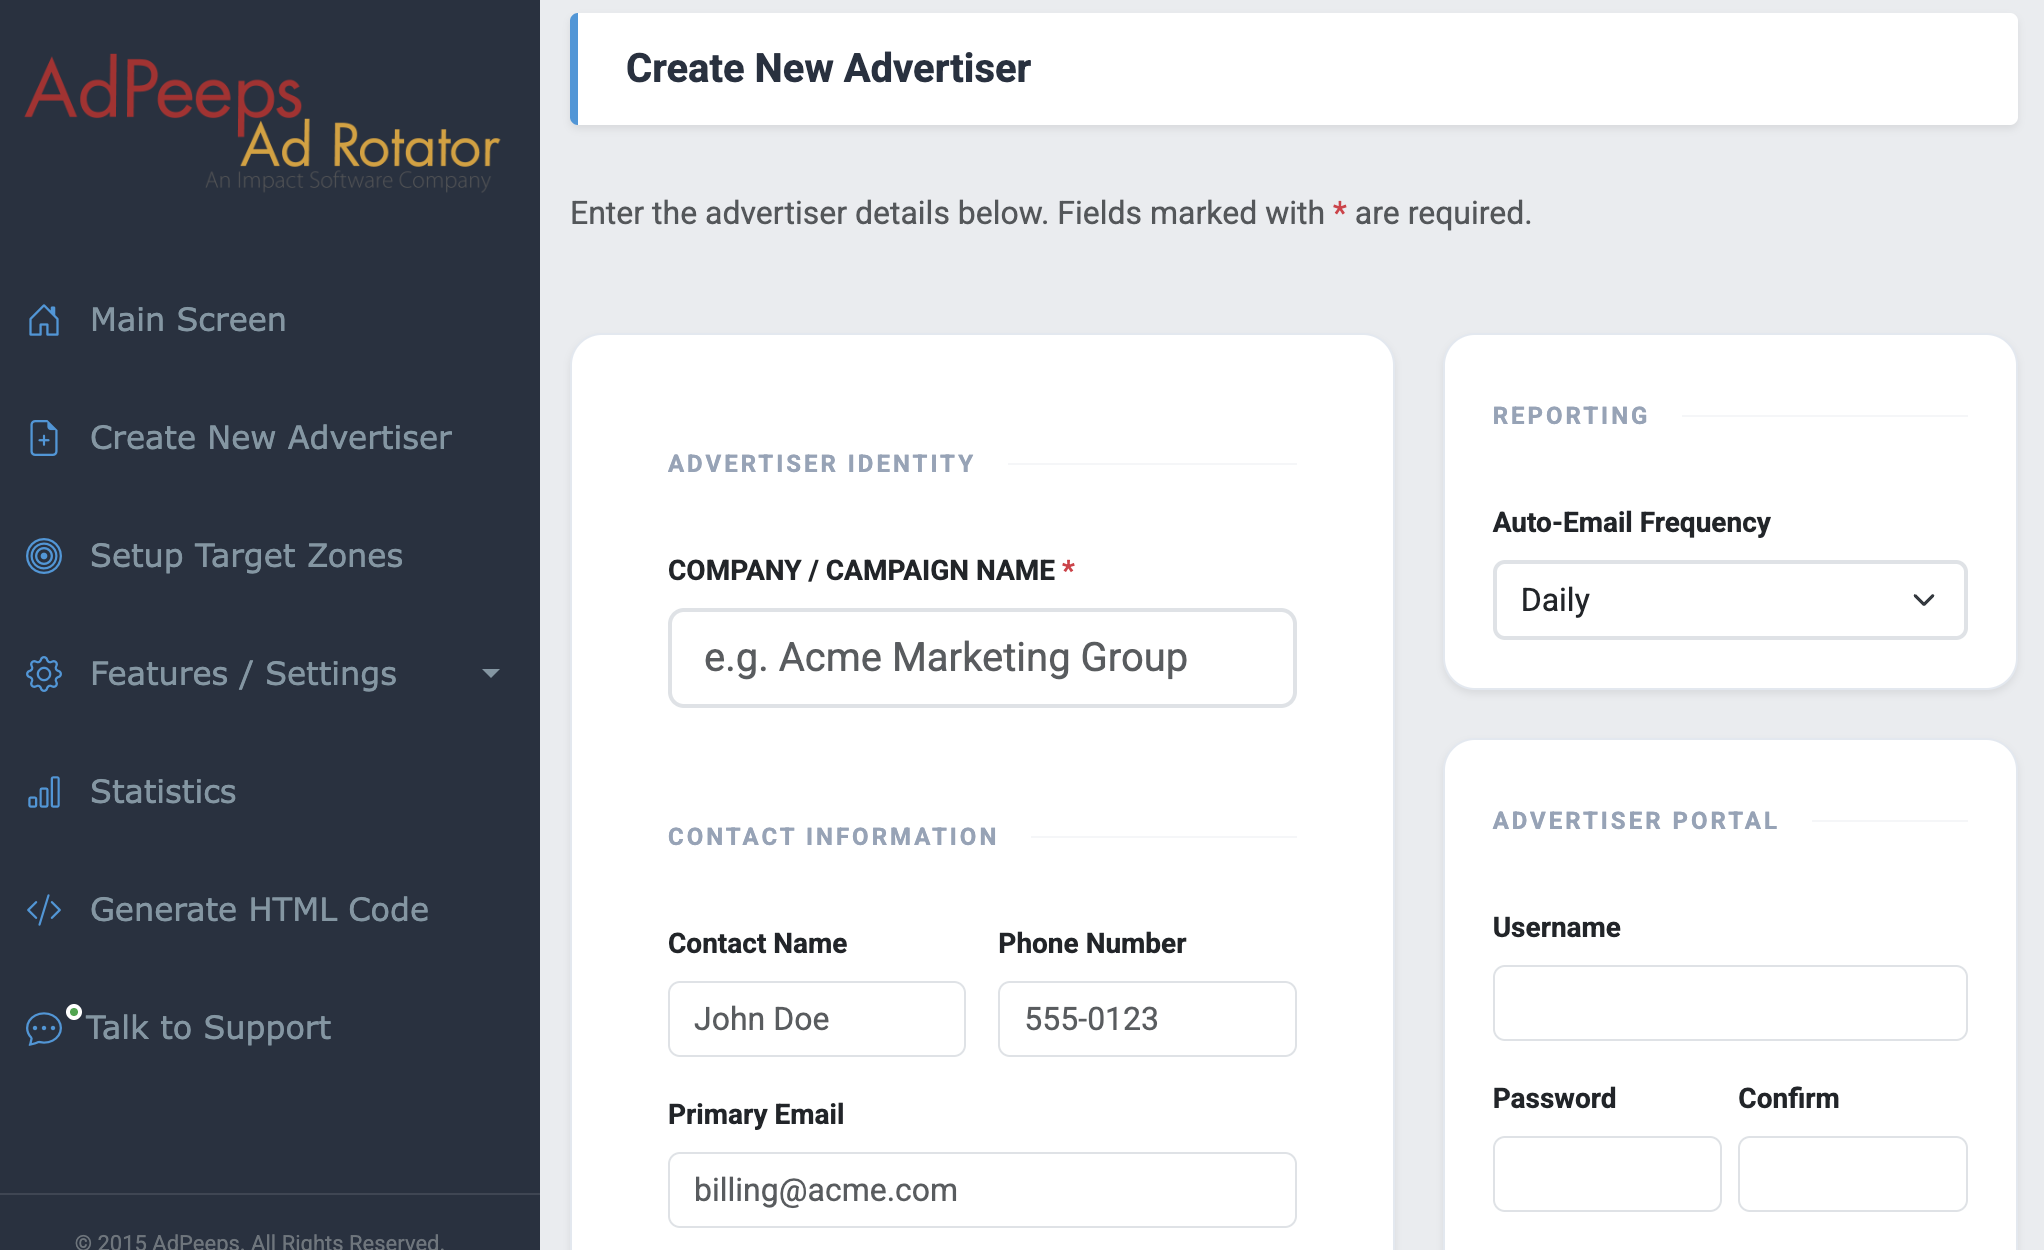
Getting Started
Creating your first campaign is quick and straightforward! From the left-hand navigation menu, simply click the Create New Advertiser button to get started. You’ll be taken to a setup screen where you can configure your campaign — and don’t worry, the only thing you need to fill in is the campaign or advertiser name. Everything else is optional!
Campaign Settings
While you’re here, you have some great options to customize how your campaign is managed:
- Advertiser Name – The only required field to get started
- Username & Password – Set login credentials if you’d like your advertiser to have their own access to the platform
- Statistics Emails – Choose to automatically email campaign stats on a daily, weekly, or monthly basis
- Advertiser Ad Control – Toggle this on if you want to allow the advertiser to modify their own ad
Saving Your Campaign
When you’re ready to move on, you’ll notice two buttons at the bottom of the screen. Clicking Save Advertiser will save your campaign and return you to the main screen. If you’re ready to keep the momentum going, click Save & Setup Ad to save your campaign and jump straight into uploading your first ad — a great time saver!
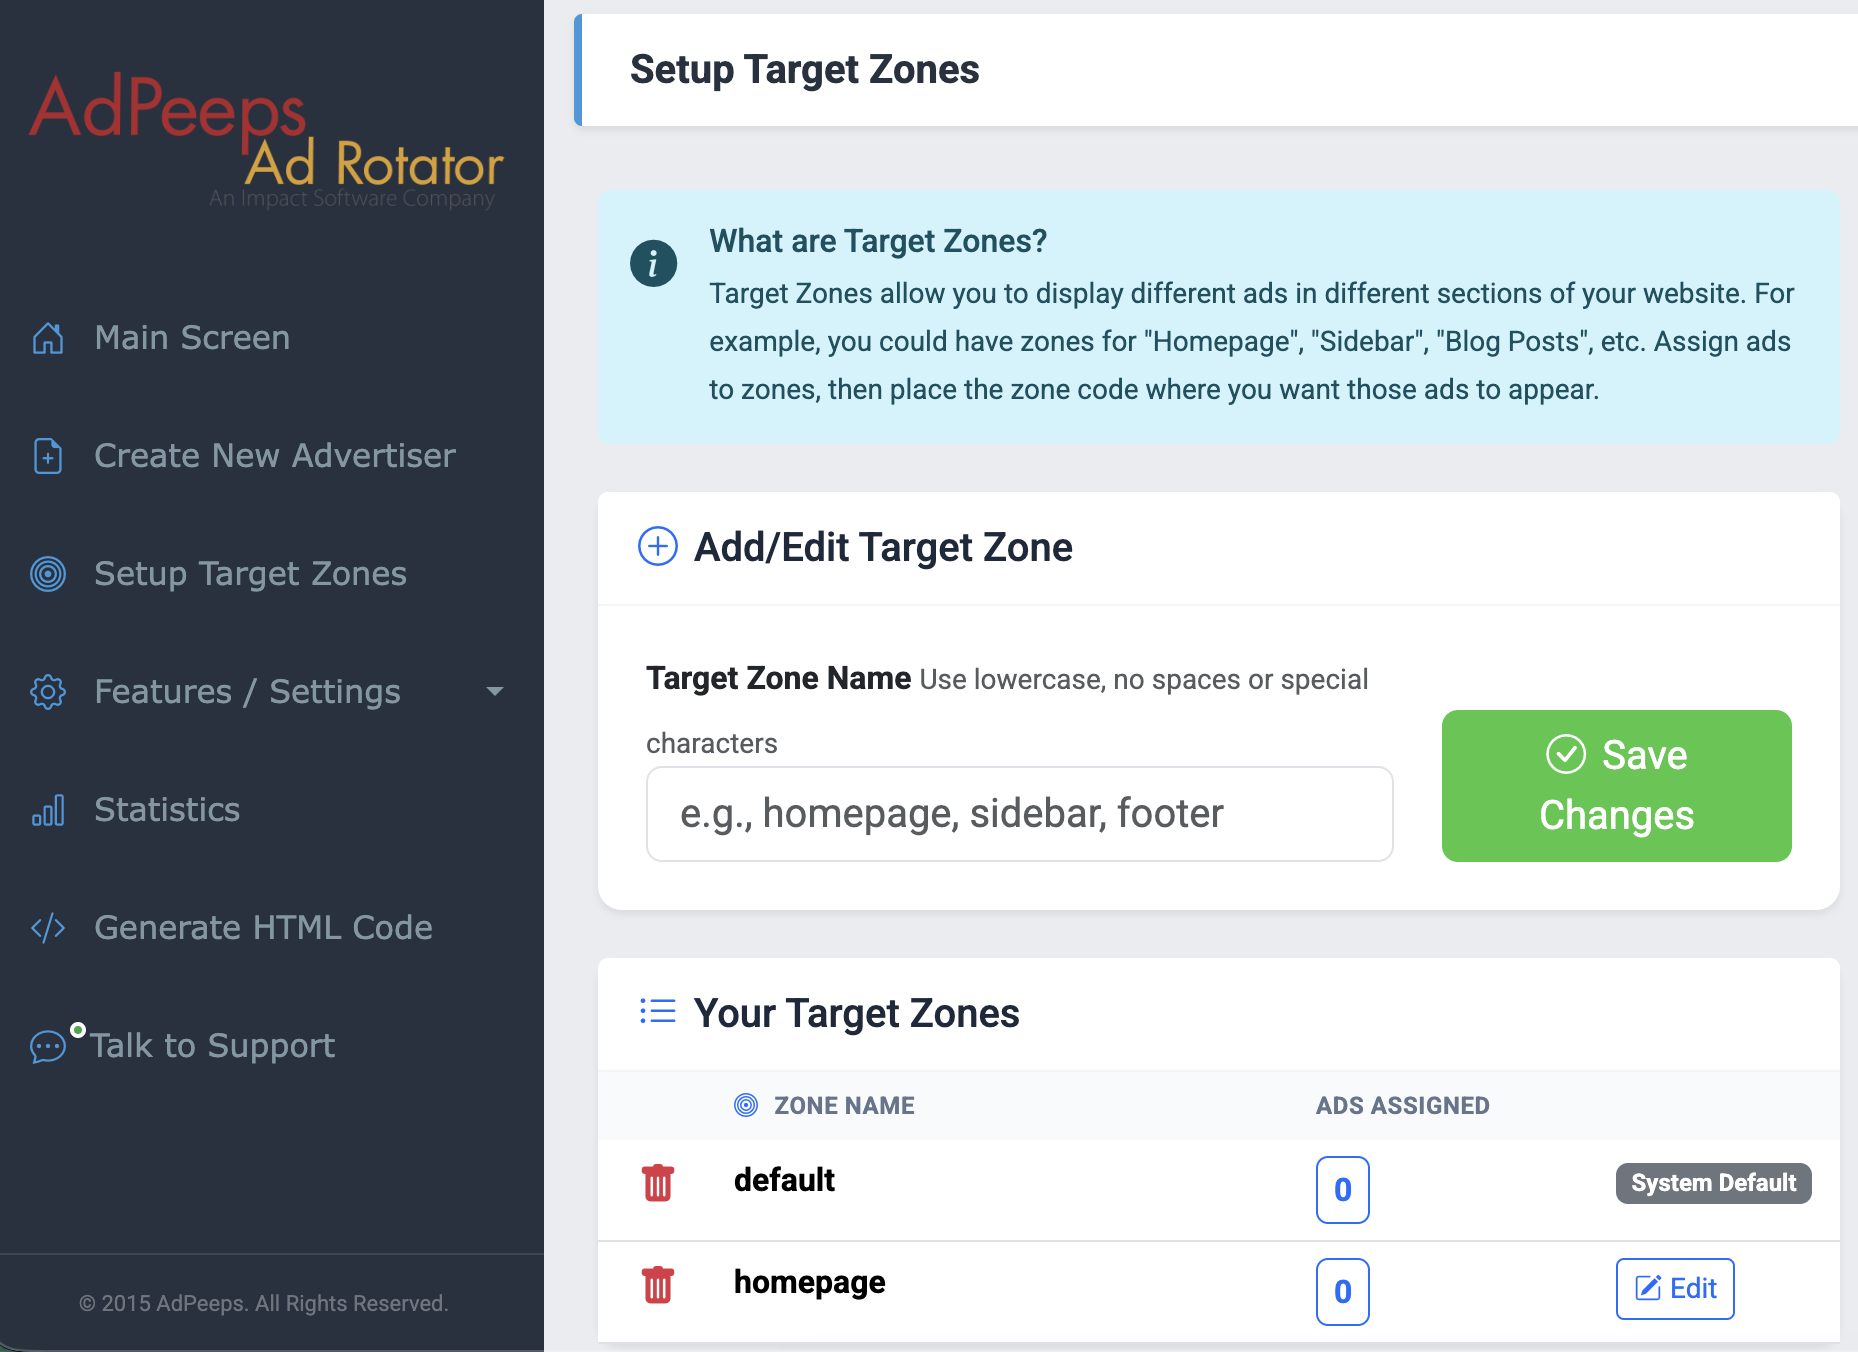
What Is a Target Zone?
Target Zones are a powerful way to control where specific ads appear on your website. Think of each zone as a designated ad placement — for example, you might create zones for your Homepage, Sidebar, or Blog Posts. Once your zones are set up, you simply assign ads to the appropriate zone and place the generated zone code wherever you want those ads to display on your site.
The good news? The platform comes with a default zone already built in, so if your site only needs one ad placement, you can skip this step entirely and all of your ads will automatically be assigned to the default zone.
Creating a Zone
When naming your zones, keep it simple! Zone names should be lowercase with no spaces or special characters. Underscores and dashes are perfectly fine to use. Here are a few examples to get you started:
topsideblog-postshomepage_banner
Keeping your zone names clean and consistent will make it much easier to manage your placements as your campaign grows.
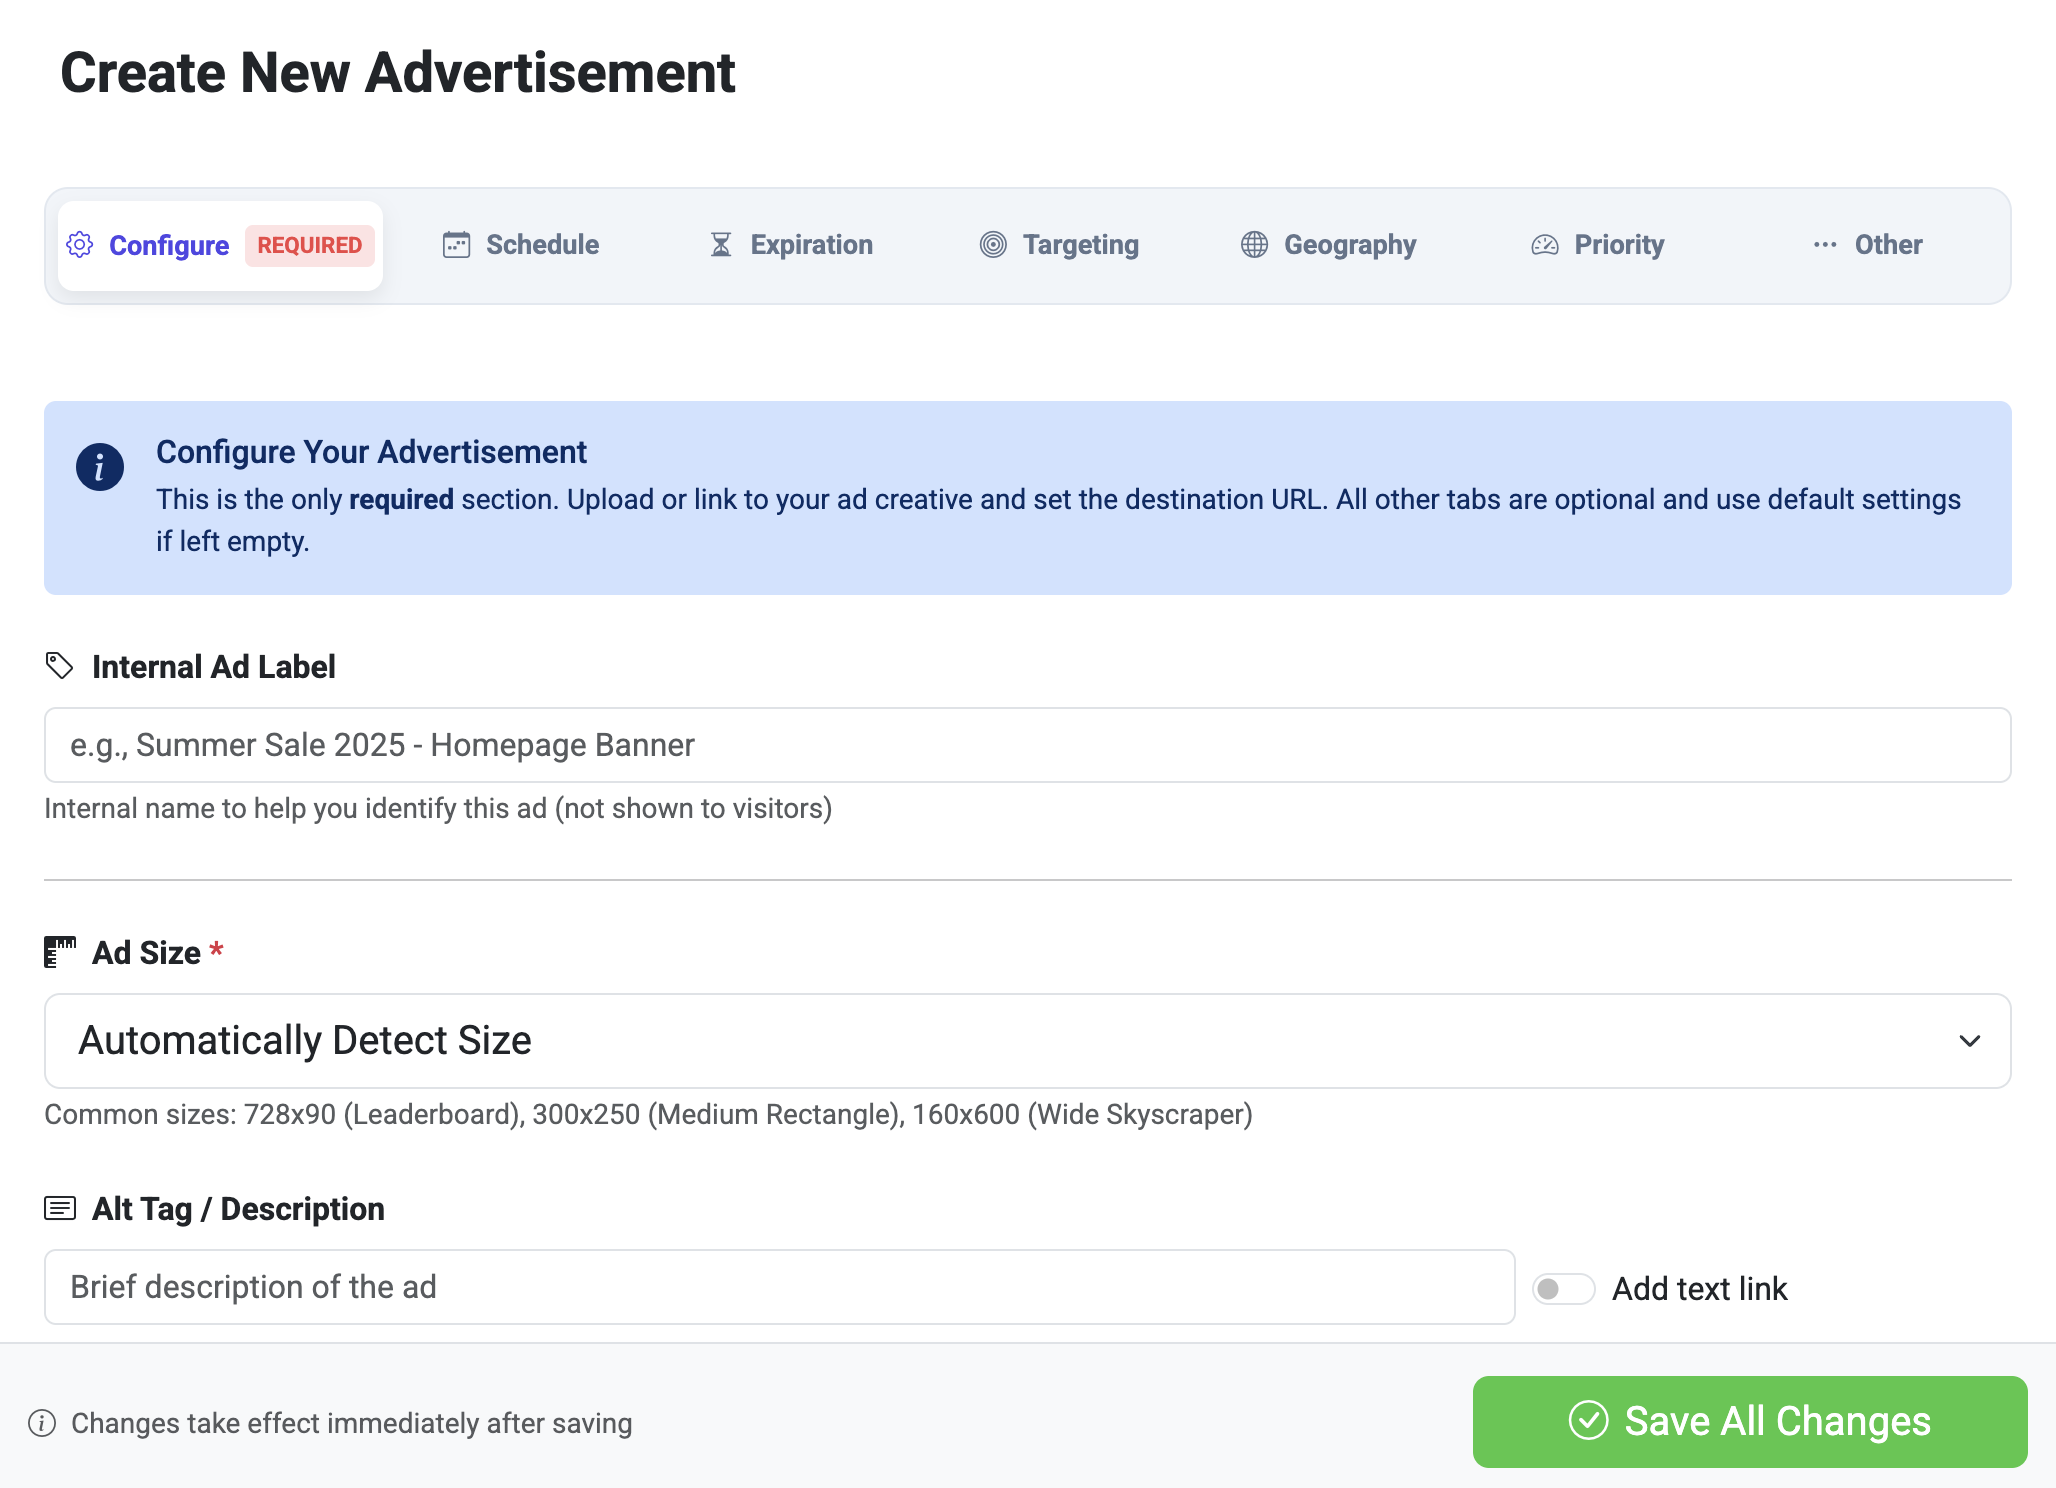
Uploading your ads works a little differently than other features on the platform — it’s the one step not accessed from the left navigation menu. Instead, head to your campaign’s main view panel to get started. Once you’re there, you’ll see the ad setup screen organized into seven sections. Don’t let that intimidate you though — only the Configure Your Advertisement section is required. Everything else uses smart defaults if left untouched!
The Seven Sections Explained
🔲 Ad Size
If you’re uploading an ad file, the system will automatically detect the size for you. If you’re linking to a remote ad, simply select the size from the dropdown menu. Creating a text ad? Select Text Ad from the dropdown and the screen will refresh to show you the relevant fields.
⚙️ Configure (Required)
This is the only required section. Upload your ad creative from your computer, via a remote URL, or as Rich Media. Then enter your click destination URL — the webpage visitors will land on when they click your ad.
📅 Schedule
Control exactly when your ad runs. By default, ads display 24/7, but you can customize:
- A start date for when the ad begins showing
- Specific days of the week (e.g., Sunday through Saturday)
- Specific hours of the day you want the ad to be active
⏱️ Expiration
Define when your ad should stop showing. By default, ads never expire, but you can set expiration based on:
- Unique or total impressions or clicks
- A set number of days or months from the start date
- A specific date
You can also configure:
- Daily Impression Cap – The maximum number of times the ad shows per day
- Daily Cap Distribution – Choose to show the ad as quickly as possible until the cap is hit, or spread it evenly throughout the day
- Frequency Cap per Visitor – Limit how many times the same visitor sees your ad within a 24-hour period
🎯 Targeting
Control which pages or sections of your website display this ad using the Target Zones you set up earlier. If no zone is selected, the default zone will be used automatically. You can also set network restrictions to prevent the ad from showing on specific domains within your network.
🌍 Geographic Targeting
Show your ad only to visitors from specific countries, states/regions, or cities. Keep in mind that country-level targeting is 99% accurate, while city-level targeting is approximately 66% accurate due to ISP routing variations. For more details, visit the full geotargeting documentation.
📊 Priority
Control how often your ad appears relative to others on the platform. Higher priority ads show more frequently. You can also enable Auto-Weighting (AI Optimization), which automatically adjusts ad priority based on click-through rate (CTR) performance — serving better-performing ads more often and scaling back underperformers.
Use this guide for setting priority levels:
- High Priority – Best for premium advertisers or top-performing ads
- Medium Priority – The default setting for balanced rotation
- Low Priority – Great for filler ads or testing new creatives
🔧 Other (Advanced Settings)
These optional settings cover edge cases and special configurations:
- Default Ad (Fallback) – When enabled, this ad will show whenever no other eligible ads are available
- Companion Ad – When enabled, multiple ads from the same advertiser can appear on the same page simultaneously
- Move Ad to Different Advertiser – Transfer this ad to another advertiser account if needed
- Custom Field – An optional field for custom reporting or integrations
Ad Preview
Once your ad is uploaded, an Ad Preview section will appear so you can see exactly how your ad will look on the site. If it doesn’t appear right away, give it up to 30 seconds to sync to the CDN servers.